Table of Contents
ToggleA broken ice maker doesn’t mean you need to replace your entire Whirlpool refrigerator. Whether the unit is producing slow cubes, jamming, or refusing to work altogether, a replacement ice maker is one of the most straightforward repairs a homeowner can tackle. Most installations take under an hour and require only basic tools. This guide walks you through identifying your model, sourcing the correct part, and installing it safely, all without calling a service technician.
Key Takeaways
- A replacement ice maker for a Whirlpool refrigerator is an easy DIY repair that takes under an hour and requires only basic tools, saving you the cost of a service technician.
- Always locate and verify your exact refrigerator model number before purchasing a replacement ice maker—ordering the wrong part wastes time and money.
- Unplug your refrigerator before starting any work, disconnect the water line and electrical connector, remove the old ice maker, and install the new assembly by reversing these steps with hand-tightened fasteners.
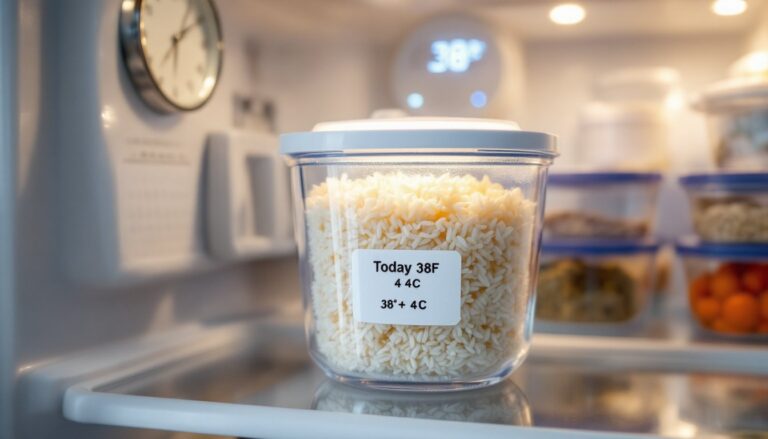
- Common ice maker failure signs include jamming cubes, slow production, grinding noises, water leaks, or the motor running without forming ice—verify your freezer is at 0°F or colder and the water supply is connected before replacing the assembly.
- After installation, wait 6–12 hours for cubes to appear; if nothing happens after 24 hours, check that the freezer temperature is correct and the water supply is flowing, then reset by unplugging for 5 minutes.
Why Your Whirlpool Ice Maker May Need Replacement
Ice makers wear out. The motor that cycles the eject arm, the heating element that releases cubes, and the water inlet valve all have finite lifespans. Most Whirlpool ice makers last 7–10 years before one of these components fails.
Common failure signs include cubes jamming inside the bin, a motor that runs but no ice forms, slow production, or the unit stopping mid-cycle. Sometimes water leaks from the maker onto the floor or inside the freezer compartment. Other times, the eject arm gets stuck and you hear grinding noises but nothing happens.
Before replacing the entire assembly, confirm the water supply line is connected and the inlet valve upstream isn’t frozen or clogged. Check that the freezer is set to 0°F or colder, ice makers don’t function reliably above that temperature. If water reaches the maker but cubes still won’t form or eject, the ice maker assembly itself is the problem.
Finding the Right Replacement Ice Maker for Your Model
Identifying Your Refrigerator Model Number
Whirlpool uses different ice maker models across its product lines. French-door, side-by-side, and top-freezer units often use different assemblies, so you must find your exact refrigerator model number before ordering a replacement.
Look for the model number on a label inside your freezer, usually on the wall above the ice bin or on the side wall. The label will show a code like WRF560SMHZ or similar. Write this number down or take a photo. Alternatively, check your refrigerator’s manual or the sticker on the back of the unit. Do not guess, ordering a part for the wrong model wastes time and money.
Compatibility and Parts Selection
Once you have the model number, use Whirlpool’s official parts website or a qualified parts supplier to confirm the correct ice maker assembly for your refrigerator. OEM (original equipment manufacturer) parts cost $150–$400 depending on the model: aftermarket equivalents may cost $80–$200 and often carry manufacturer warranties.
Before purchasing, verify that the replacement includes all necessary hardware: the plastic assembly housing, ejector arm, motor, heater coil, and all mounting brackets. Some kits include the water inlet valve: others don’t. Check the listing carefully. OEM parts typically include installation instructions and the correct fasteners. Buying the wrong ice maker means returns, delays, and frustration, spend the extra five minutes confirming compatibility upfront.
Step-by-Step Installation Instructions
Preparing Your Refrigerator and Gathering Tools
Before touching anything inside your refrigerator, unplug it. This is non-negotiable. Working on a live appliance risks shock, even with the door open. Wait five minutes for residual electrical charge to dissipate.
Gather these tools and materials:
• Phillips and flathead screwdrivers (or a multi-bit driver)
• Needle-nose pliers (helpful for removing clips)
• Adjustable wrench (for the water line fitting, if your model requires disconnect)
• Towels (water will spill from the old assembly)
• Work gloves (for grip and minor cuts from sharp edges)
• Flashlight (freezer interiors are dark)
• New ice maker assembly with gaskets and fasteners
• Teflon tape (optional: some water connections benefit from it)
Empty or mostly empty your freezer. You’ll need space to work and easier access to the ice maker, which is usually mounted on the back wall or side of the freezer cavity. Leave the refrigerator door propped open during the job.
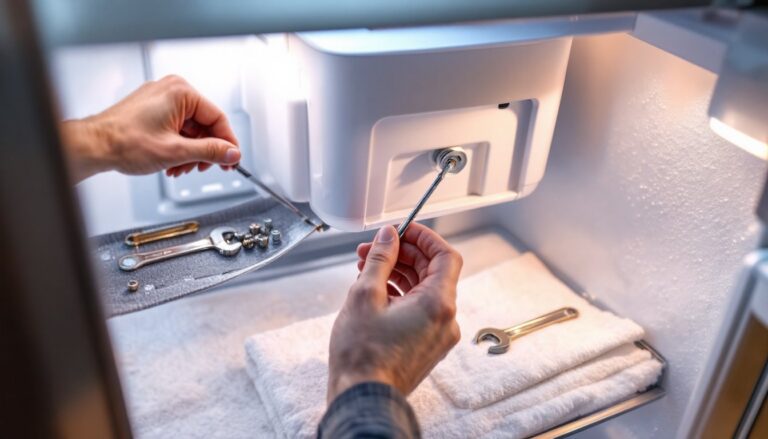
Removing the Old Ice Maker and Installing the New One
Step 1: Locate and photograph the water inlet connection. The ice maker receives water via a small plastic or copper tube, typically fitted to the back of the unit with a clip or compression fitting. Take a photo of how it connects before touching anything, you’ll reconnect it the same way.
Step 2: Disconnect the water line. If it’s a push-fit connector, pinch the release clip and gently pull. If it’s a compression fitting (threaded), use your adjustable wrench to turn counter-clockwise. Water may drip, so position your towel underneath. If the line is frozen, a hairdryer on low heat softens it enough to work free.
Step 3: Disconnect the electrical connector. Most Whirlpool ice makers use a simple plug-in connector near the assembly. Gently pull it straight toward you, don’t yank at an angle. This is a fragile plastic connector: forcing it breaks it.
Step 4: Remove mounting fasteners. The ice maker typically bolts to the back freezer wall with 2–4 screws. Locate them (your flashlight helps here), and remove them with your screwdriver. Some models use clips instead, press down or slide them to release.
Step 5: Pull out the old assembly. Slide it forward gently. It should come free without force. If it resists, check for fasteners you may have missed or water lines still attached.
Step 6: Install the new ice maker. Position the new assembly in the same location as the old one. Align mounting holes or clips with the bracket. Fasten with the bolts or clips provided in your kit. Hand-tighten first, then snug firmly with your screwdriver, don’t over-torque, which cracks the plastic housing.
Step 7: Reconnect the water inlet. Slide the water supply tube back onto the fitting or hand-thread the compression fitting until snug. Use your wrench for one final quarter-turn if it’s a compression fitting. Do not over-tighten: you’ll crack the fitting or strip the threads. Check that the connection is dry. A small drip at first is normal while air purges from the line.
Step 8: Restore the electrical connection. Press the connector onto the ice maker’s plug until you hear or feel a click. Verify it sits flush: a loose connection means no power.
Step 9: Plug the refrigerator back in. Listen for the motor to hum within the first 30 seconds, that’s normal. The ice maker should cycle within 2–3 minutes, and cubes should appear in 6–12 hours. If nothing happens after 24 hours, check that the freezer is at 0°F or below and the water supply is flowing. Reset the ice maker by unplugging the refrigerator for 5 minutes, then plugging it back in.